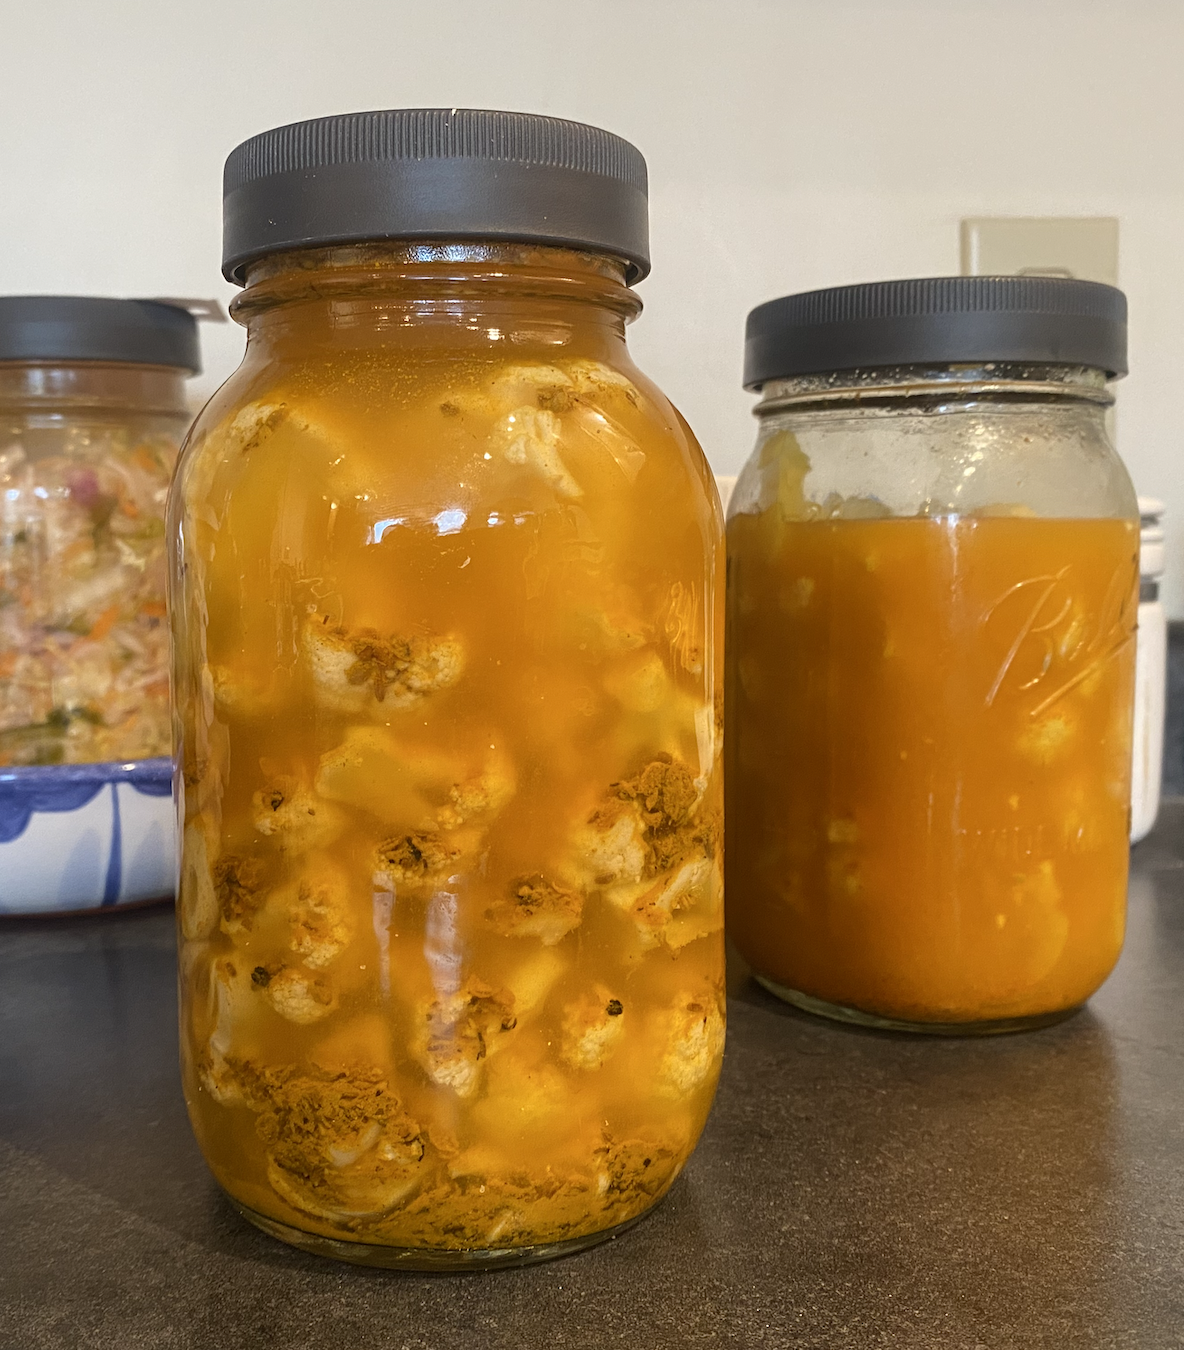
Tangy Curried Cauliflower

You can make these delicious and vibrantly yellow florets with a favorite store-bought curry powder, or create your own fresh mixture of curry spices. I have tried both techniques, and both resulting ferments are delicious. However, the depth lent by freshly toasted and ground spices is perceptible, and worth the time, IMO.

Ingredients:

  • 1/2 head of organic cauliflower (this will fit into 1 quart mason jar)

  • 1 generous tablespoon of your favorite curry powder, or make your own blend! Here’s what I use:

  • spices: 1 t teaspoon each of toasted cumin, coriander, fenugreek, 1 teaspoon of black peppercorns, 2 teaspoons of turmeric (plus anything else you might want). Put everything into a mortar and pestle and grind to a medium coarseness.

  • 1 inch of fresh ginger root sliced into coins, 2 garlic cloves, sliced

  • 2% brine (2 teaspoons in 2 C water)

  • 1/4 cup of juice from any previous ferment (vegetables, sauerkraut, fermented pickles) - this is charmingly called “backslop”. This step is optional, but kicks the ferment into gear a little faster by adding a dose of microbes and acid.

Equipment:

glass mason jar and lid

mortar and pestle

cutting board and knife

skillet to toast spices

Technique:

  • pull the cauliflower into small-medium-sized florets

  • toast and grind your spices, or open your favorite jar of curry powder or paste

  • slice ginger and garlic

  • Put everything in the jar. You can be methodical, putting the spices in the bottom, then layering cauliflower followed by ginger and garlic, repeating up the jar, finishing with the cauliflower. Or just tumble everything in together. The ferment doesnt really care about order.

  • Leave about 2 inches of clearance at the top, and then pour in the brine to almost cover the veggies.

  • add your backslop to submerge your veggies. If you are not using a backslop, simply add more brine.

  • put the lid on and turn it upside down a few times to shake it all up and distribute the spices.

  • store the ferment in a safe spot, loosening the lid so it can expel CO2, one of the end-products of fermentation.

  • taste in about 5-7 days, and when it is as tangy as you’d like it, tighten the lid and put it in the fridge.

These tangy morsels are great snacks, or served alongside a dal and rice. It’s a beautifully vibrant addition to a thali or regular dinner platter. Don’t discard the curry liquid! It’s great in soups than need some zing, or added to some olive oil to create a curry vinaigrette pre-loaded with acid, salt and probiotics!

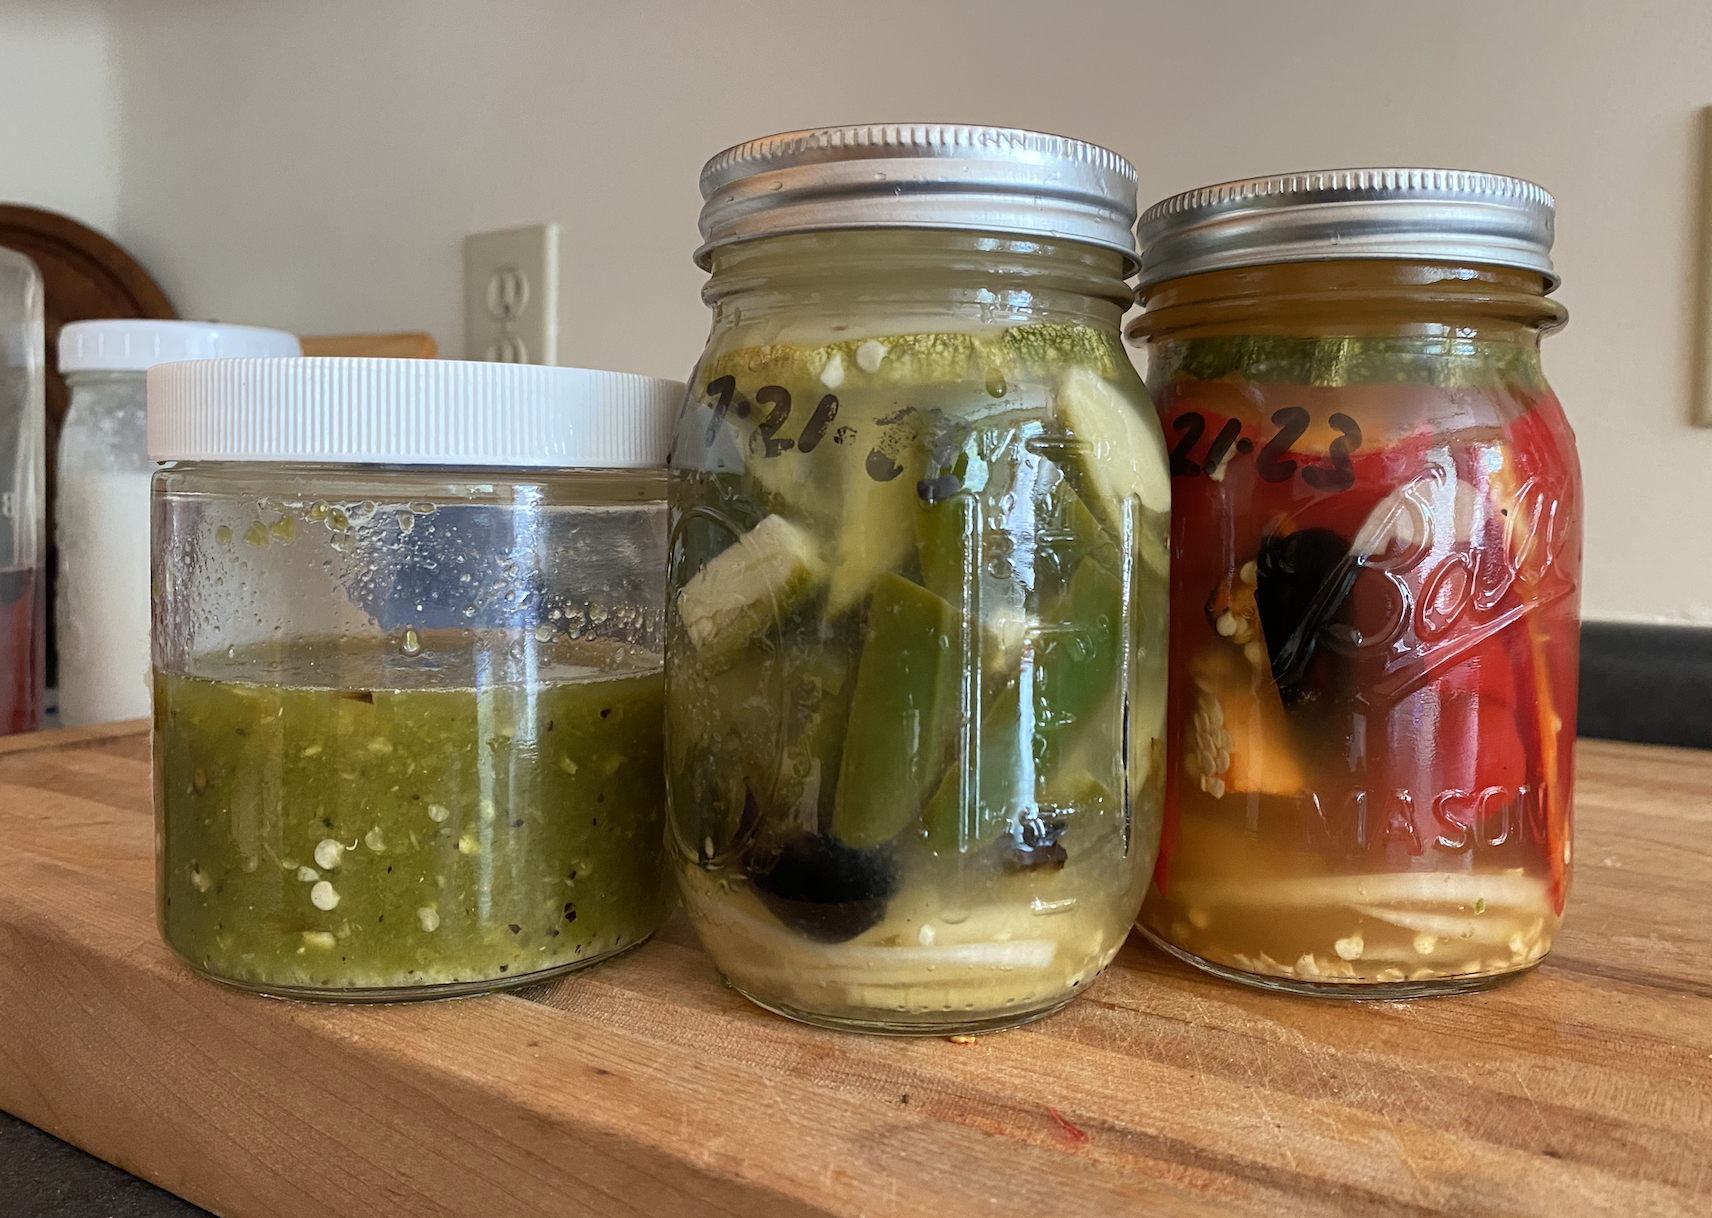
Fermented Hot/Chill Sauce

Fermented peppers of all kinds are delicious. You can create your own signature blends of flavor and heat (or not) with a fermented pepper condiment that adds zest and zing to any dish. You might even add a drop of fermented hot sauce into a cocktail for an eye-opening beverage experience.

Ingredients and equipment:

6 peppers - I’ll keep it simple and use 6 jalapeños, but you can choose whichever peppers you desire. Mix and match once you have the basic technique down.

1/2 onion, (3 cloves of garlic (optional, but garlic a good good thing)

1/2 T peppercorns (black, or your choice)

3% brine (15 g salt + 500 ml water or 2 tsp salt + a pint of water)

shot (+/- 1/4 c) of previous fermentation liquid, sauerkraut juice or yogurt whey (optional, but gives the fermentation a boost, especially if you’ve grilled some of your peppers)

1-2 mason jars with shoulders, lids

1/2 inch thick slice round vegetable (turnip? daikon? wide carrot?) to wedge into the jar under the shoulders. or other submersion method like a ziplock filled with brine

blender (immersion blender, Vitamix whatever you’ve got), colander, bowl

apple cider vinegar (or another preferred vinegar)

cutting board, sharp knife

cookie sheet and broiler, or grill (if you wish to add a smoky quality to your sauce)

Method:

I like to ferment the peppers in chunks and then puree them once they are fermented. You could also ferment pre-puréed veggies, but it’s harder to keep the mash submerged and you’ll risk mold contamination.

1) To grill some or all of your peppers, broil or grill them whole until a bit charred on all sides. Remove from the oven until cool enough to handle, then remove the stem and seeds.

2) stem and chop all your peppers into chunks (with or without seeds - your choice). Slice the onions into 1/4 inch or thinner slices. cut garlic cloves in half.

3) Into your mason jar with shoulders, put the black peppercorns, followed by the onion slices, garlic and then the peppers. Add anything else you’d like (herbs? spices?), but put smaller items on the bottom so they don’t float and can be held down by the vegetable chunks. Leave at least 1-2 inches of space below the shoulder of the jar.

4) Pour in 3% brine to cover the vegetables to the shoulder level. Add a shot of liquid from a previous fermentation, especially if a lot of your peppers are grilled (= sterilized).

5) Wedge a large disc of turnip/carrot/radish under the jar’s shoulders to keep the veg submerged. Top up with more brine/fermentation liquid to cover the disc by at least 1 inch. The disc will be sacrificial, and composted once it’s done its job of keeping the peppers etc. underwater until the end of the fermentation period.

6) Ferment for a week or two in a cupboard. Put the jars on a tray - your ferment might bubble over a bit. Check it every morning to ensure the peppers are still submerged, push down on the disc to encourage the bubbles to fizz out, or slide a knife down the side. Another way of keeping the veggies underwater is to put a ziplock filled with brine on top of the ferment. The goal is to keep the fermenting vegetable mass anaerobic.

7) Taste a pepper every once in a while (you might have to rearrange the jar a bit to access one). Once it reaches the desired flavor, discard the top veggie disc, and drain your ferment through a colander into a bowl (save the liquid!)

8) In a food processor, put your drained fermented vegetables, 1/4 cup of the fermentation liquid and 1/4 cup of apple cider vinegar (or a different vinegar) and whizz it up. This is where the mixture becomes your own. More or less vinegar? A little bit of sugar? Some fresh fruit?

9) Once you’ve blended your mash to your taste, you can leave it as a blend or you can strain the liquid out and package as drops (if you’ve chosen really fiery peppers, this might be the way to go).

10) This ferment will last almost indefinitely in the fridge, and they make great gifts.

I love fermented pepper sauce on eggs, fish tacos, drizzled on soups, mixed into a salad dressing, zinging up a stews, or even a drop into a cocktail - your imagination is the limit!


Fermented Crisp and Sour Slaw

This salad is a tangy shredded vegetable ferment, tossed with a delicious vinaigrette - no goopy mayonnaise here. It’s a great side for grilled meats or fish, but can stand alone as a lovely lunch salad with a hunk of sourdough and a slice of crumbly blue cheese. The first part describes how to shred and ferment the vegetables. Part 2 describes how to drain and dress the vegetables for a final delicious Fermented Slaw.

Part 1 - Make the fermented vegetables

Ingredients: (can vary according to what you have in the fridge)

1 pound of green cabbage, sliced thinly (purple? broccoli? cauliflower? turnip?)

1 large onion, red or yellow, sliced thinly (I prefer red for the color, and don’t use a sweet onion - too sugary)

1 large green bell pepper, sliced thinly, (or use a mandolin)

1 large carrot (shredded on a cheese grater, large holes)

1/2 green apple, shredded on the same cheese grater (optional)

1/4 pound celeriac (celery root, shredded on a cheese grater, large holes) or 1 teaspoon celery seed

4 tsp salt (2% by weight, so you could also weigh all your veggies for a result in grams, then divide by 100 to get the grams of salt needed)

Equipment:

Chopping board, knife, (mandolin?), large mixing bowl, 2 quart mason jars with lids

Technique:

Mix the shredded vegetables with the salt in the mixing bowl. Massage well with your hands until the vegetables wilt a little and give off some liquid. Pack into the jars, pressing the vegetables underwater. Don’t add extra brine yet. The veggies will settle down over night and express more liquid, but if some still rise above the surface of the liquid the next morning, add more brine (1 Tbs/cup water) or some extra liquid from a previous ferment. Ferment 4-7 days, until the veggies are tangy. Inspect the veggies every morning, submerging then firmly. Taste them at day 4, and continue fermenting until they taste nicely sour. Then continue with part 2.

Part 2 - Construct the Slaw:

Make about 3/4 - 1 cup of vinaigrette. It can be your favorite recipe, or try the mixture suggested below by my friend Alex Lewin (Author of Real Food Fermentation, the book which has inspired many of my recipes).

Put the fermented vegetables in a colander in a large bowl and press out the juice. Reserve.

In another bowl, mix the pressed fermented veggies with half of the vinaigrette. Add more if needed to nicely moisten the veggies - don’t drown them. Put the mixture back in your jars and refrigerate.

Voilá! Fermented Slaw! Enjoy!

****

Alex’s Carolina-Style vinaigrette: 1/2 cup of juice pressed from the ferment, 1/4 C of honey, 6 Tablespoons of oil (sesame? olive? coconut? Your choice, or mix it up!) 2 teaspoons of dry mustard, 1 tsp grated fresh ginger, freshly ground black pepper.

What to do with leftover fermentation juice? Mix with oil and spices and make salad dressing. Use as a salty-sour liquid condiment or addition to soup. Use it as a marinade. For your next vegetable ferment, use it to cover the vegetables instead of plain brine. It’s a source of probiotics, so you could also drink it as a tonic - watch out, it’s very salty!!

Fermented Potatoes

For some reason I didn’t think one could ferment potatoes because one doesn’t eat them raw. Then I challenged myself, did some research and lo and behold, lots of people are fermenting potatoes. So I thought I’d give it a try; total success! I tossed the fermented spuds in olive oil, salt and rosemary and roasted them. They were delicious, had an interesting tang and were chewy! Give it a try with any potato, including sweet potatoes.

Ingredients and Materials

3-4 potatoes of any kind or color

Brine; 2 tablespoons of salt dissolved in 2 cups of water

Sharp knife, cutting board and a glass jar with a lid. I used a regular quart-sized mason jar.

Technique

Cut the potatoes into any shape you desire - chunks or rounds, and fill your jar about 3/4 - 4/5 full. Pour the brine on top to cover by about an inch so the potatoes are submerged. They may float a little, push them down. If they stubbornly persist in floating, you can weight them down with a clean weight, some people pass a lovely stone through the dishwasher to have on hand for such eventualities.

Mold will eventually form on any vegetable that protrudes from the fermentation surface, so do pay attention to this detail. If mold does form, or a whitish scum forms on the surface of the liquid, not to worry. Rescue any floating weirdly-affected vegetable piece, wash it off if it’s still firm, and put it back in. Skim the surface, blot it with a paper towel and wipe around the top interior edge and surface of the jar to decrease the less-desirable microbe load. Give up on getting it all - you are vastly outnumbered, your job is to keep the majority underwater happy. The brine and increasing acidity will do the remaining work.

Put the jar of brined potatoes (lid on loosely to avoid large contaminants) in a cupboard out of direct sunlight. Examine it every morning, and push the vegetables underwater if things start to float. Remember that CO2 is being released during the fermentation and will create bouyancy.

Wait 3-4 days, then drain and rinse the potatoes, and use them as you would in any potato recipe. I roast them, put them in soup, etc.

Sweet, red and yellow potatoes in brine. And now we wait…

Lacto-fermented Vegetables

This is an easy and basic technique you can apply to almost any vegetable. Lacto-fermenting the vegetables turns them into a live probiotic food, preserves them so they don’t require refrigeration, and boosts their safety and nutritional value. The microbes add vitamin B12 and K, and pre-digests some of the fiber. The ‘lacto-’ part means that a lot of the fermentation is performed by the microbe species Lactobacillus, among many thousands of other species. The microbes in the ferment metabolize the plant sugars to release lactic acid and other delicious byproducts, resulting in a tangy funky umami-rich flavor profile.

Ingredients:

Choose one or some of the following to equal a pound of vegetables (more is fine, you’ll just be chopping for longer).

Radishes (any color - the black ones are very metal), Daikon radishes (the purple ones are are trippy), carrots (any color, so rich!), red peppers, turnips, rutabaga, onions (red, yellow, green), garlic cloves, ginger coins, Brussels sprouts, fennel, Kohlrabi, broccoli, cauliflower, cabbage (red or green), celery root, baby bok choi, green beans, cauliflower chunks, even leaves like kale, collards, spicy mustard can go in. Herbs and spices are delicious and fun to add, so collect any or all of the following: cumin, coriander, black peppercorns, red pepper flakes, fennel, rosemary, lemon or other citrus zest. You’ll make your own signature flavor ferment.

Materials and equipment:

Regular salt*, water, jars with lids (any size - I use mason or ball jars with plastic lids), a measuring cup and measuring spoons, maybe a kitchen scale, chopping board, big and small knife.

Technique:

1) Chop the vegetables. Get creative and make shapes (hearts, flowers, triangles, squares…) and pack the veggies into the jars. Either tumble them in or arrange them artfully. You can layer them with slices of onion, or throw in handfuls of whole spices. Leave at least 2 inches of headroom at the top of the jar.

2) Make 2% brine (1 T salt/cup water = approximately 2%*) and pour it in to cover the vegetables, or you can get fancy and use an online brine calculator. Optional; you can pour in a dollop of liquid from a previous fermentation - sauerkraut, fermented pickles, yogurt whey - if you wish to give your ferment a boost. Not necessary though, You’ll create an environment for the correct microbe populations to thrive, boom and bust setting the stage for the next wave of microbes.

3) Put a lid loosely on the veggies and put them in a cupboard at room temperature. Wait 4-5 days, resubmerging the veggies every morning - keep them underwater, the microbes need an anaerobic environment. Taste them - when they are tangy enough to your palate, tighten the lid and put them in the fridge. They will continue to ferment, but at a much slower rate than at room temperature.

Some of my favorite combinations:

  • white daikon spears with black peppercorns and red pepper flakes - put a spicy fermented spear into a martini (gin, of course) as a savory addition replacing an olive!

  • coins of variously colored winter radishes pack beautifully into a jar

  • purple-topped turnip rounds with red onion slices, black peppercorns, coriander and green onion lengths - amazing on a salad or with a grilled entrée

  • green cabbage sauerkraut with outrageous pink watermelon radish hearts or triangles along the sides make a lovely gift

  • halved dark green Brussels sprouts with whole cumin, coriander and black peppercorn

There are so many possibilities! Let me know what you discover!

_____________________________

* Salt caveat: Salt (NaCl) is part of the environment you create to nurture the desired microbes and discourage the wrong ones (for example Clostridium Botulinum or E. Coli). If you are creating a ferment for a low-salt-person, you can decrease the brine concentration to 1% and add some sour/acidic cloudy liquid from a previous ferment - called “backslopping”. This immediately decreases the PH (increases acidity) and gives the desired microbe populations an advantage to out-compete undesirable competitors. Be assiduous about keeping the vegetables underwater, and monitor the ferment vigilantly. Your nose will tell you if anything is wrong.

In terms of food safety, fermented food is very safe. C. Botulinum and E. coli cannot survive in the low PH (acidic) environment rapidly created during the first phases of fermentation, such that the beneficials rapidly out-compete any competition.

turnips, celeriac and rutabagas from an overexuberant CSA share

Fermented Apple/Pear Chutney

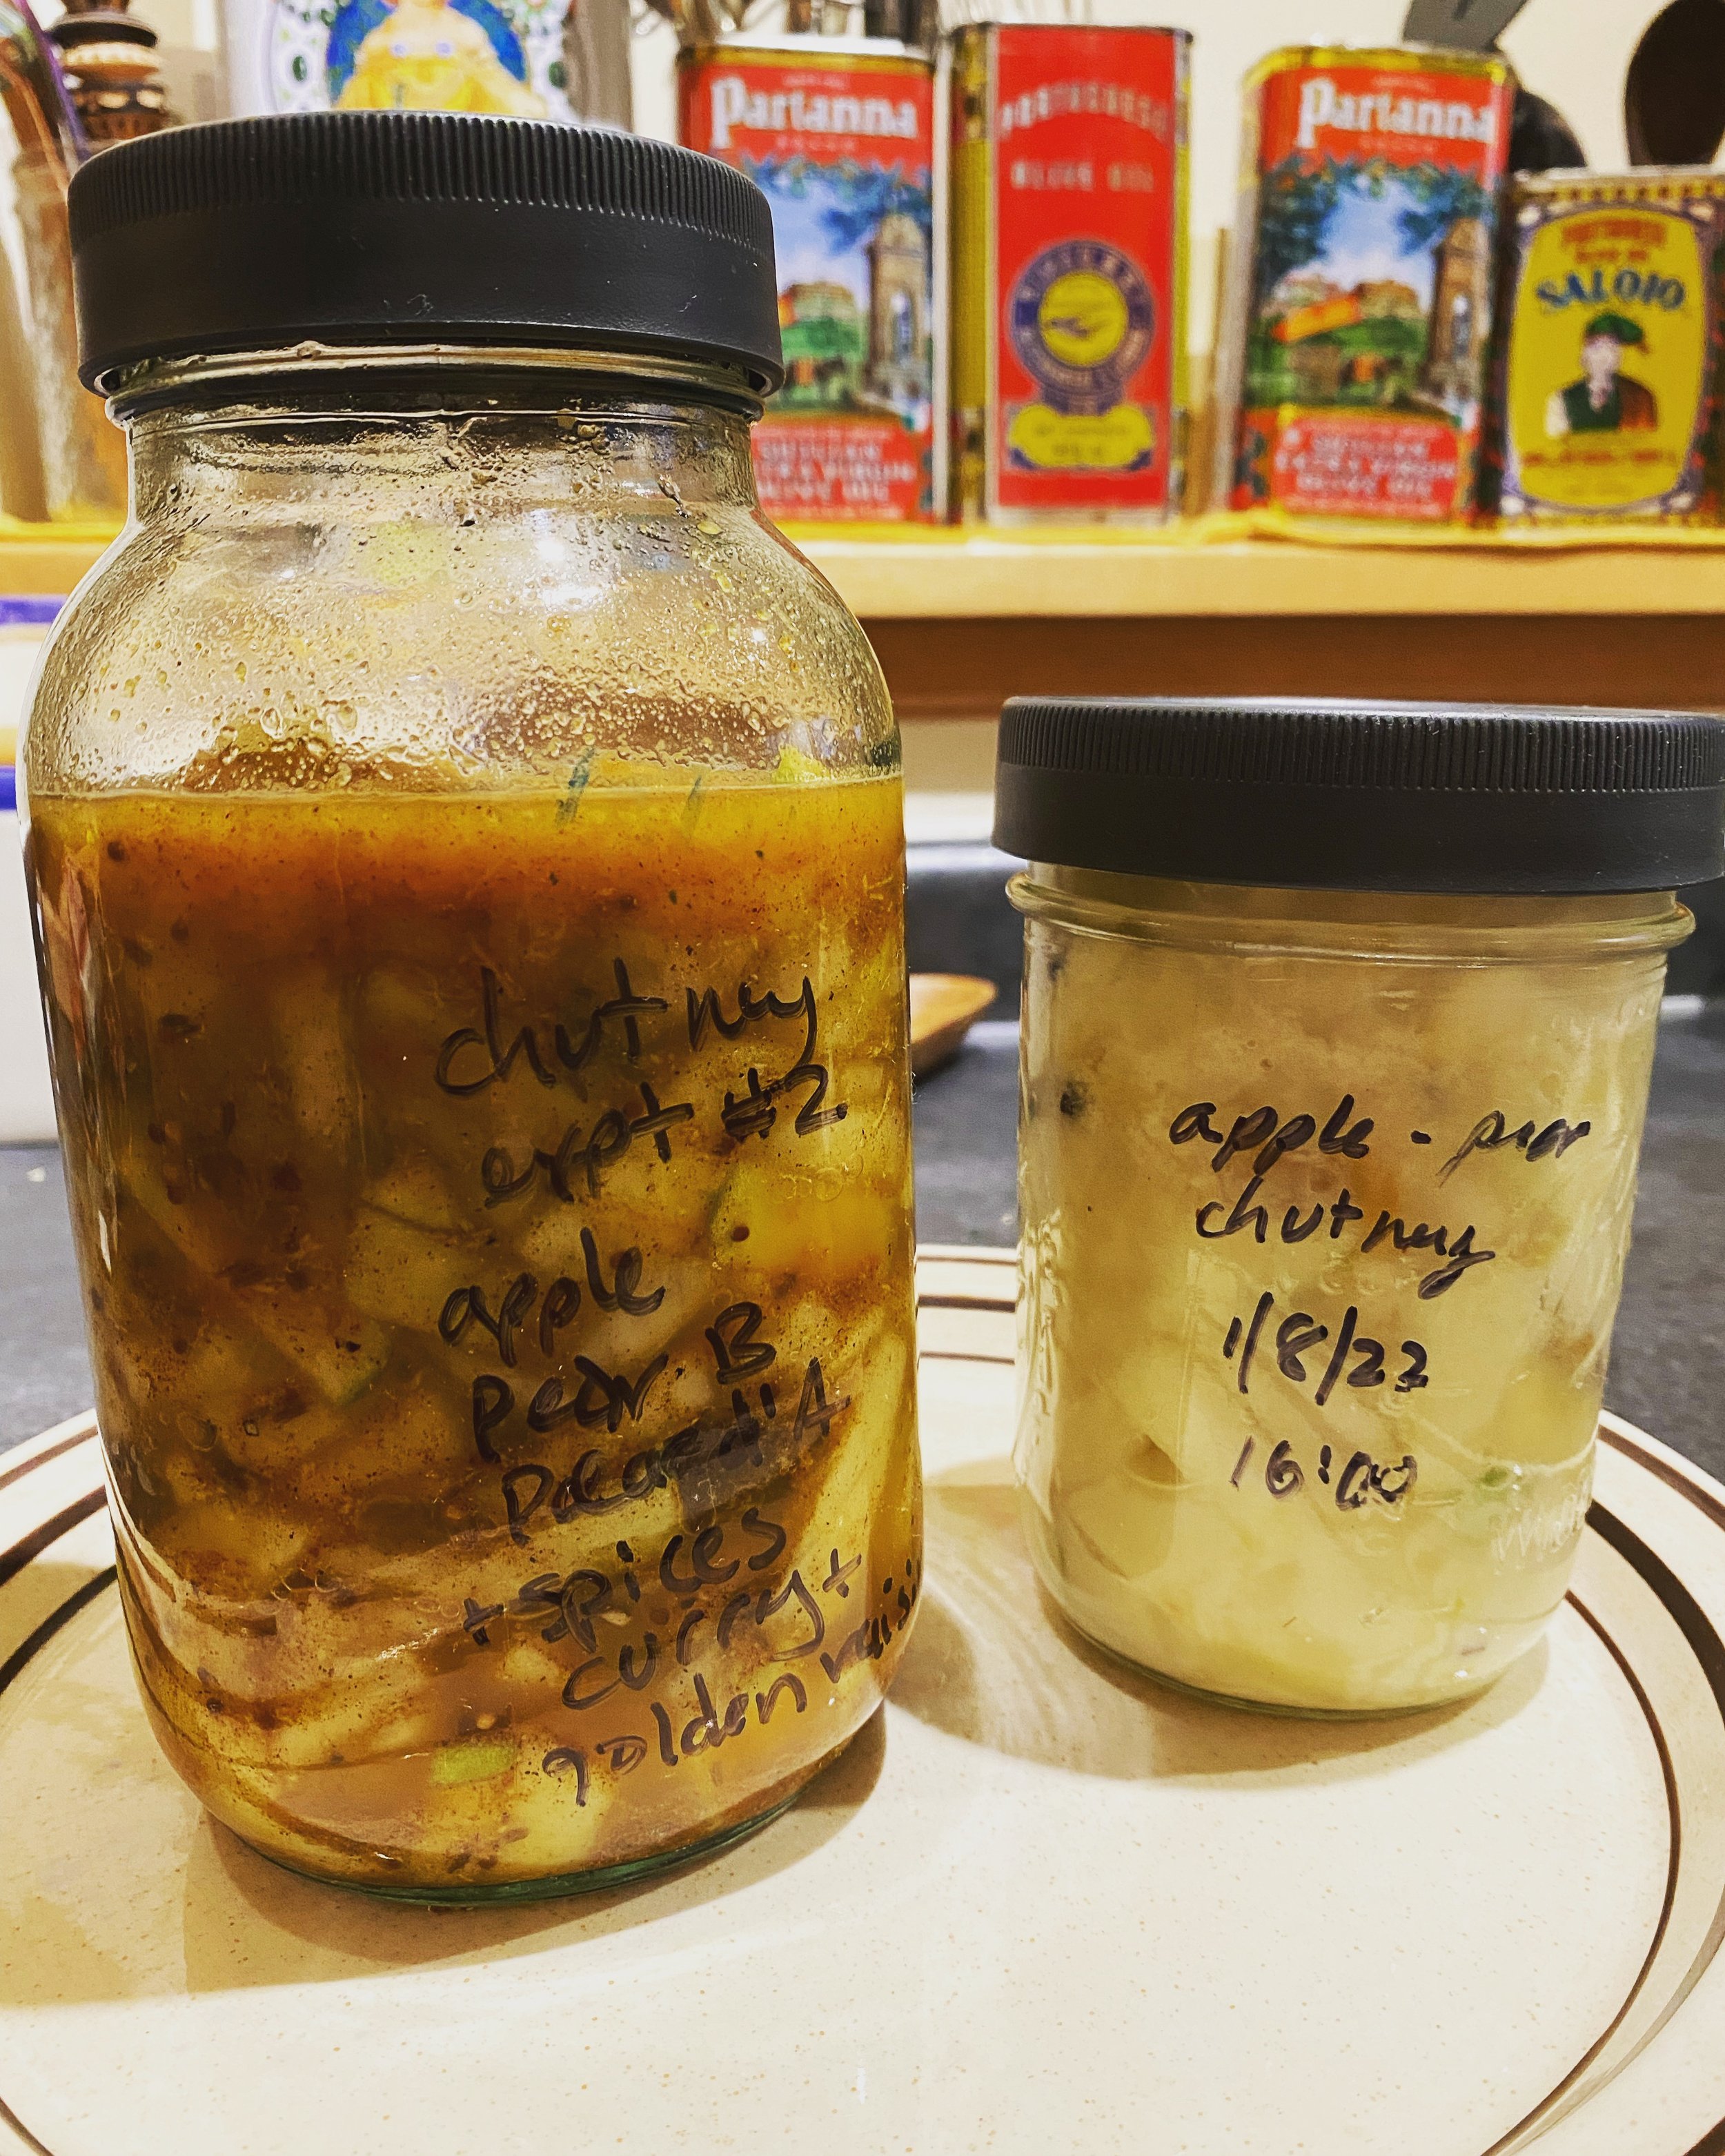
I love the sweet-sour-funky bite of chutney. It’s great mixed into things, blending it onto sauces or dips, topping savory fish or grilled things, and generally adding an interesting flavor note. Upon exploration, I found; 1) cooked chutneys, 2) raw ones that need to be eaten more or less immediately, and then 3) fermented ones which introduce an even more interesting and complex flavor. To ferment a chutney, one must inoculate the fruit mixture with some sort of culture. I tried it with a fizzing and active kombucha. You can also use yogurt whey (the liquid expressed from the yogurt the day after you’ve taken a few spoonfuls out). My favorite way to eat this right now is to pile some chutney it on a piece of delicious homemade bread, top it with some sharp cheese and put the whole thing under the broiler for a couple of minutes until the cheese is toasty and the fruity spices fragrant.

This recipe uses apples and pears, but you could vary the fruit mixture to your liking. My friend Alex uses peaches and plums, and more of a cinnamon/clove/peppercorn spice blend. You can truly make this your own combination. Because of the high sugar content of the ingredients, this ferment will move fast - keep an eye on it, and don’t tighten the lid until you put it in the fridge.

Chutney with kombucha as source of culture, and curry spices added for fun

Ingredients:

  • 1 Granny Smith apple, diced small

  • 1 ripe-but-not-overly-so Bartlett Pear, diced small

  • 1 D’Anjou pear diced small

  • 1/2 preserved lemon or lime, minced (optional, but amazing - I’m teaching a class on how to do this delicious thing)

  • 3 tablespoons’ish of golden raisins or 6 chopped dates

Put into a bowl and toss to mix.

Add curry-inspired spices (all, most, or your favorite blend) , and culture

  • Toast 1 teaspoon each of cumin seeds, mustard seeds, fennel seeds until fragrant and put them with the fruit. Add 1 teaspoon each of ground cinnamon, turmeric and 1/2 teaspoon of asafetida and ginger powder (or 1 inch of grated fresh ginger), a few grinds or more of black pepper, and the crushed contents of 3 green cardamom pods.

  • Add 1/4 cup of active kombucha and mix everything together well.

Technique:

Mix it all up in a big bowl, and then smash and crush into a jar. You want expressed liquid to push up over the fruit. If it doesn’t quite cover, add a bit more kombucha. Date the jar, put a loose lid on it so CO2 can escape, and put the jar in a dark cupboard for 2-3 days. It should get a little fizzy. Smell and taste-test until it is tangy-sweet to your liking and then tighten the lid and put it in the fridge. Apparently you could even freeze it at this point (I would do that in plastic containers or zip-lock bags.)

This ferment that doesn't include salt, so if you are a low-salt person, or are cooking for someone with high blood pressure, this ferment will work well for you.

Yogurt

Yogurt is a simple dairy ferment that requires a constant temperature for 100F/45C. Once that part is managed, the rest is dead easy.

Ingredients:

1 Q dairy milk (cow, goat, etc.)

2 T starter culture (yogurt from a previous batch, preferably local organic - the CoOp or farmers market are great sources)

Equipment:

thermometer

saucepan

yogurt maker/ environment that will hold 110F/45C for over 4 hrs, and up to 8.

Method:

  • Heat milk in the saucepan to 180F for 20 min. This sterilizes the milk so the culture you add has a head start.

  • Cool the milk to 110F, stir in the starter culture and whisk to incorporate

  • pour the cultured milk into the yogurt maker and set for 6-8 hours. Do not jiggle or disturb.

  • refrigerate until chilled


Kombucha

Kombucha is a fermented beverage that falls into the category of live probiotic food. The name “kombucha’ is actually a misnomer (not cha/tea made of kombu) but it has caught on, and is now entrenched in popular nomenclature. Kombucha has a deep history from the Orient, to Eastern Asia, Russia and into Europe. It’s basically fermented black tea  sweetened with sugar and cultured with a SCOBY. This is an acronym for Symbiotic Culture Of Bacteria and Yeast. The green tea-honey version is called ‘Jun’, but its basically the same idea, and my current Kombucha culture came from a Jun that I then added to black tea and sugar.

Primary Fermentation

Ingredients:

8 C water (1/2 recipe: 4 C water)

2 teaspoons/10g of loose black tea, or 2 black*** tea bags. ***(what about decaf ? see note below) English breakfast, Oolong, or orange pekoe are great. You could also use green. (1/2 recipe; 1 teabag)

3/4 C sugar (any kind, doesn’t need to be special, I use plain ole’ white sugar) You could also use honey (use 2/3 the amount of honey - it’s sweeter) or maple syrup, or agave etc. It just cannot be fake - the microbes need real carbohydrates to metabolize! (1/2 recipe: 3/8 C sugar)

SCOBY plus some of it’s previous fermentation liquid - this is the source of the microbial culture

Equipment:

Large jar or bowl (that can hold 8 C/2 Liters/1 gallon, not metal) (1/2 recipe; 4 C quart jar)

clean tea towel and rubber band

______

Put the loose or bagged tea in a tea pot, and add boiling water - cover, steep (30 min - overnight), and then cool. Discard the tea bags or leaves.

Add brewed tea to the jar, add water to make up a total of 8 C and add 3/4 C sugar (or the 1/2 amounts) - dissolve. Put today’s date on the jar with a sharpie.

Add your SCOBY plus liquid to the diluted sweet tea. Cover with a tea towel and secure with a rubber band so nothing flies in, and wait 1-2 weeks.

I suggest tasting it every day so you get an idea of how it progresses. Using a clean spoon, dip out some of the liquid from underneath the newly-forming SCOBY. It will go from very sweet to slightly vinegary and fizzy on the tongue. How far you let it go is up to you. It will move faster in warmer months, and slower in cooler temperatures.

Secondary Fermentation

If you want to get fancy with flavors, you can take the liquid from the first batch (not the scoby), add more food (in the form of fruit sugar), and put it into corked vessels that will trap the CO2 and make a fizzier beverage.

Ingredients:

Liquid from the primary fermentation (leave about 2 inches of liquid in with the mother SCOBY)

Fruit juice (pasteurized or freshly squeezed/prepared) or pieces of clean fruit or berries, any combination

Equipment:

Clean funnel is useful for pouring kombucha from first batch into bottles without a big mess.

Clean corked bottles. I like the grolsch or swing armed ones, and I also like using old liquor bottles - they are so pretty with the colorful kombucha in it.

____

Put juice or fruit in the bottom of the bottles, and carefully pour some of the primary kombucha liquid on top. Leave a good 3-4 inches of space at the top of the bottles. Cork the bottles, put in a cupboard at room temperature and wait 2-6 days. Burp the bottles every day. I suggest you also taste them every day to get an idea of how fast they will move. If the primary ferment is quite sour, the secondary won’t need very much time, and could tip over into vinegar quickly, so keep an eye (taste bud?) on them. A new baby SCOBY will form in the secondary too, since it is from the same culture as the mother. You might want to remove that before refrigerating - up to you. I shake the bottle and then pour the kombucha through a strainer into a glass. This way I get the benefit of the liquid culture, but not the solids. Some folks simply consume them ( I just can’t… too slimy.)

Once you are happy with how they taste, move them to the fridge where they will slow down drastically, and be a more refreshing beverage. The cool thing about these is that they re-fizz themselves overnight due to the slow fermentation that still occurs in the corked bottles.

Kombucha may be consumed as-is, or used as mixers or soda replacers in cocktails or mocktails.

*** Remember that kombucha is a caffeinated beverage. Commercially decaffeinated teas can be treated with various chemicals like ethyl acetate or methylene chloride. If you wish to make a more decaf version, you can pre-steep the original black tea bags for 30 seconds to remove some of the caffeine - though sadly it actually turns out it doesn’t reduce the caffeine level that much. Drain off that water, and proceed as if that never happened. Remember to label everything with date started and whether it’s + or - caffeine. But again, DIY decaffeinating doesn’t remove that much caffeine. You could also use your SCOBY to make kombucha with a tisane/naturally decaffeinated tea, for example chamomile. But the SCOBY does prefer to be caffeinated, so every other batch REcaffeinate your mother SCOBY by doing a regular black tea brew.

My favorite flavors right now are: black raspberry, raspberry, lavender, ginger, peach, and lemon-rosemary. Basically what I have around the house with frozen berries or fruit from the summer. Other great flavors are pomegranate, sour cherry and blueberry, which I create by buying bottles of organic juice from the store. Once the juice is open, keep it refrigerated, or it will ferment, because everything ferments!! I pour the juice into ice cube trays so I can store small amounts in the freezer that I may then add to future secondary ferments.

Secondary Ferment flavors; Add about 1/4 C of liquid pasteurized juice, fresh squeezed juice, a few berries, to some lightly smashed fruit slices to a clean bottle 2/3 full of your strained primary ferment (once you are happy with the flavor and kick). This is where you can get very creative.

  • pear-ginger

  • toasted coriander and lime (toast and crush 2 teaspoons coriander seeds, add to bottle along with the juice of 1 lime) ** this one is delicious!

  • blueberry (add 1/4 blueberry juice) or 1/4 C of smashed (washed) fresh or frozen blueberries

  • tart cherry (add 1/4 tart cherry juice to the bottle)

  • raspberry (add 6 cleaned raspberries -frozen OK- to the bottle. Be sure to check for mold on the raspberries, there’s always an evil one somewhere...)

  • lemon-rosemary

  • strawberry-sage

  • rosa rugosa petals (beyond amazing - 5-6 flowers-worth of petals and it’s like you are drinking beautiful light roses. collect your rose petals away from roadways and other pollution sources. I like gathering them near beaches.)

If you forget about your flavored kombucha and it goes waaaaay too sour, then you have kombucha vinegar! Use it to make salad dressings or give soups or sauces a bright acid note. I forgot a raspberry secondary once, and made a (lot of) delicious raspberry vinaigrette.

Trouble shooting: how to get “fizz”:

The fizz is the “exhaled” carbon dioxide from the metabolic processes of the microbes. Just like us, they eat the sugar, which occur in 5- and 6- carbon chains, then break them apart into single carbon molecules. This process liberates and recaptures the stored energy between the carbon bonds. We also obtain energy from our food in this manner, and have a name for this process: metabolism. We eat foods which are made up of mixtures of fats, carbohydrates and proteins, break them apart and use them as building blocks to build and repair our bodies, and harvest the energy between the carbon bonds. We use oxygen to do it, and we exhale the most broken down and oxidized form of carbon; a single carbon atom with two oxygens attached, also known as carbon dioxide/CO2. The microbes do it in other ways, using water, but also end up releasing CO2. This is the fizz. Carbonation happens when you tighten the cap on the secondary fermentation so the released CO2 cannot escape from the vessel, and instead, dissolves into the liquid. Once your secondary fermentation has reached the flavor you like, tighten the cap, leave it at room temp for a few more hours for some more metabolism and CO2 release to occur and be captured in the closed vessel, and then refrigerate. Home made kombucha will never be as carbonated as many commercial brands because they are forcibly carbonated. Once you put your kombucha in the fridge, metabolism will continue, albeit at a very reduced rate. You might get discernible carbonation, or it might be too slow to really re-fizz. The microbes do go into a bit of hibernation. Another thing to check is if the lid of your bottle is air-tight.

IMG_2920.jpg

Kimchi

I’ve adapted this recipe from my friend Alex Lewin’s book Real Food Fermentation, Preserving Whole Fresh Food with Live Cultures in your Home Kitchen. I love how he writes, There are lots of pictures, and he gives lots of tips and troubleshooting for many ferments.. Here’s a link to check his book out on Amazon. Props also to my friend Hans Breaux, who has also shaped this recipe which is a work in progress.

Ingredients:

  • 2’ish pounds of cleaned vegetables: chopped Napa cabbage, any other cruciferous vegetables in pieces (radish coins, daikon spears, bok choy, kale shreds etc. (I like to chop my radishes into fanciful shapes like hearts and flowers.) carrots, peppers… I make sure the bulk of it is crucifers. They are the best source of microbes.

  • big bowlful, (or very clean 1/4-sinkful) of water, 1/3 C salt dissolved in it to make brine - it needs to taste quite salty!

  • 1/2 head of garlic (3-4 cloves or more!), skinned

  • 1 large or 2 small onions, chopped

  • 1/2inch knob of ginger root, grated

  • up to 1/2 C of Korean red pepper powder, red pepper or pepper flakes (** careful, to your taste) Or none if you are capsicum-averse.

  • 1 tablespoon of sugar, or 1/2 an apple or pear

  • 1 teaspoon of fish sauce (optional - this is why kimchi might need it’s own fridge) and/or fermented shrimp paste. To make it vegetarian, use soy sauce.

  • a few scallions, chives or spring onions

Instructions:

  • Put the chopped veggies into the brine and allow to sit 6 - 8 hours, or overnight. (admittance: I have also done it for 30 minutes and made successful kimchi.) Then drain the veggies. I just pull the plug out of the sink to remove the water, then re-plug to contain the veggies. The sink makes a great mixing bowl.

  • In a food processor, blend garlic, ginger, onion, red pepper, sugar and fish sauce. add minimal water to blend easily in to a paste.

  • Cut scallions attractively into diagonal 1 inch lengths, and add to veggie mixture.

  • Add the paste to the veggies and mix thoroughly. You might want to use gloves depending on how spicy you’ve made your mixture.

  • Pack into jars leaving 2 inches of space at the top, and press down to remove bubbles - liquid will rise to cover the veggies and might spill out as the ferment progesses, so I put my jars on a plate. This is an anaerobic (oxygen-free) ferment, so keeping the veggies submerged is important. You can put in some extra brine if necessary (1T salt to 1 C water) Close the jar lid (not too tightly, so CO2 may escape) and put into a cool dark place. I use a cupboard.

  • Check the jars every day - I suggest doing this in the sink. Keep submerging the vegetables to avoid mold. Taste in a day or two, it will start to taste (and smell) like kimchi very quickly! Put it in the fridge to slow the fermentation to a crawl once it has reached the desired kimchiness (5-7 days for my taste).

Kimchi is yummy on salads, in soups, as an interesting sandwich addition - anywhere you’d use sauerkraut and more!

IMG_3057.jpg

Sauerkraut

I’ve adapted this recipe from my friend Alex Lewin’s book Real Food Fermentation, Preserving Whole Fresh Food with Live Cultures in your Home Kitchen. I love how he writes, There are lots of pictures, and he gives lots of tips and troubleshooting for many ferments. Here’s a link to check his book out on Amazon. If you want a bit of live coaching, you are very welcome to grab a cabbage and join me from your kitchen on 10/7 or 11/4/21 for a zoom workshop. If neither of those dates work, you can also purchase a link to my video stream and make sauerkraut any time it suits you.

Ingredients:

  • A head of cabbage, green or red (red cabbage will give you pink or ruby kraut. You can also mix them up or layer them)

  • sea salt (2 teaspoons per pound of cabbage. The correct amount of salt is important.)

  • that’s it.

Instructions:

Remove the outer leaves and the core of your cabbage. Weigh it now before it gets messy.

Chop your cabbage roughly or finely (finely chopped creates more surface area, so the ferment will move along faster) according to your taste, and put it in a big bowl. You might have to do this in two batches if you have a lot of cabbage.

Add the appropriate amount of salt to the chopped cabbage and massage it firmly with both hands until juice starts to be expressed. You might have to pound it a bit. I use the mortar from my mortar and pestle. (Be careful of your bowl if you decide to pound. I learned the hard way that a metal bowl might be a better choice.) A fresher cabbage will be juicier.

Pack the cabbage into clean glass jars leaving a couple of inches at the top, because the cabbage will expand and liquid will rise. Use something to press it down hard to expel bubbles and have the juice rise above the level of the cabbage. I use wide-mouth mason jars and pack it down with my mortar. Any sealable jar will do. The trick is to get the cabbage underwater to protect it from oxygen.

If you don’t have enough liquid expressed to cover the cabbage, add a bit of brine (1 tbsp salt dissolved in 1 C of water), or a splash of yogurt whey, or previous batch sauerkraut/other veggie ferment juice.

Store in a cool dark place preferably between 50F-75F (10-25C). I put mine in a cupboard. Apparently, the optimum temperature is 70F/21C. And store them on a tray or plate because some liquid might leak out.

Check everyday for the first few days to make sure the cabbage stays underwater. After a week, taste it - use a clean fork so as not to introduce new organisms or salivary enzymes into the ferment. It should be bubbly and start to taste like mild sauerkraut. It’ll get even better from there. Put it in the fridge to slow the ferment to a crawl when it reaches your desired level of krautiness.

IMG_3098.jpg