Tangy Curried Cauliflower

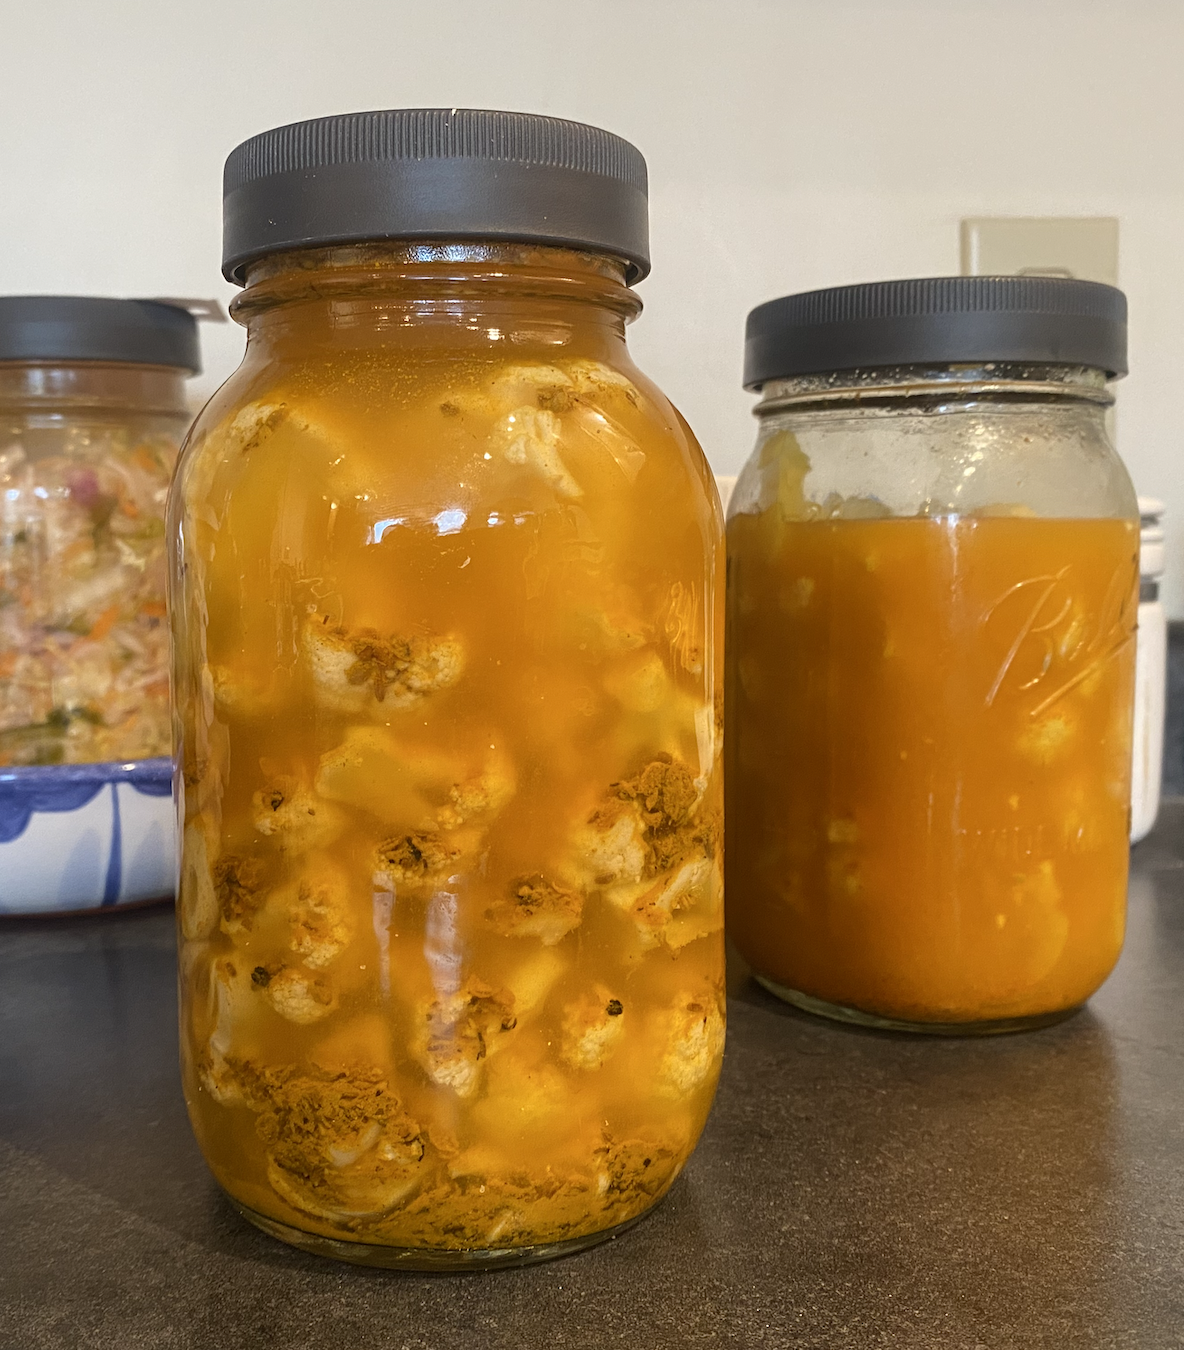
You can make these delicious and vibrantly yellow florets with a favorite store-bought curry powder, or create your own fresh mixture of curry spices. I have tried both techniques, and both resulting ferments are delicious. However, the depth lent by freshly toasted and ground spices is perceptible, and worth the time, IMO.

Ingredients:

  • 1/2 head of organic cauliflower (this will fit into 1 quart mason jar)

  • 1 generous tablespoon of your favorite curry powder, or make your own blend! Here’s what I use:

  • spices: 1 t teaspoon each of toasted cumin, coriander, fenugreek, 1 teaspoon of black peppercorns, 2 teaspoons of turmeric (plus anything else you might want). Put everything into a mortar and pestle and grind to a medium coarseness.

  • 1 inch of fresh ginger root sliced into coins, 2 garlic cloves, sliced

  • 2% brine (2 teaspoons in 2 C water)

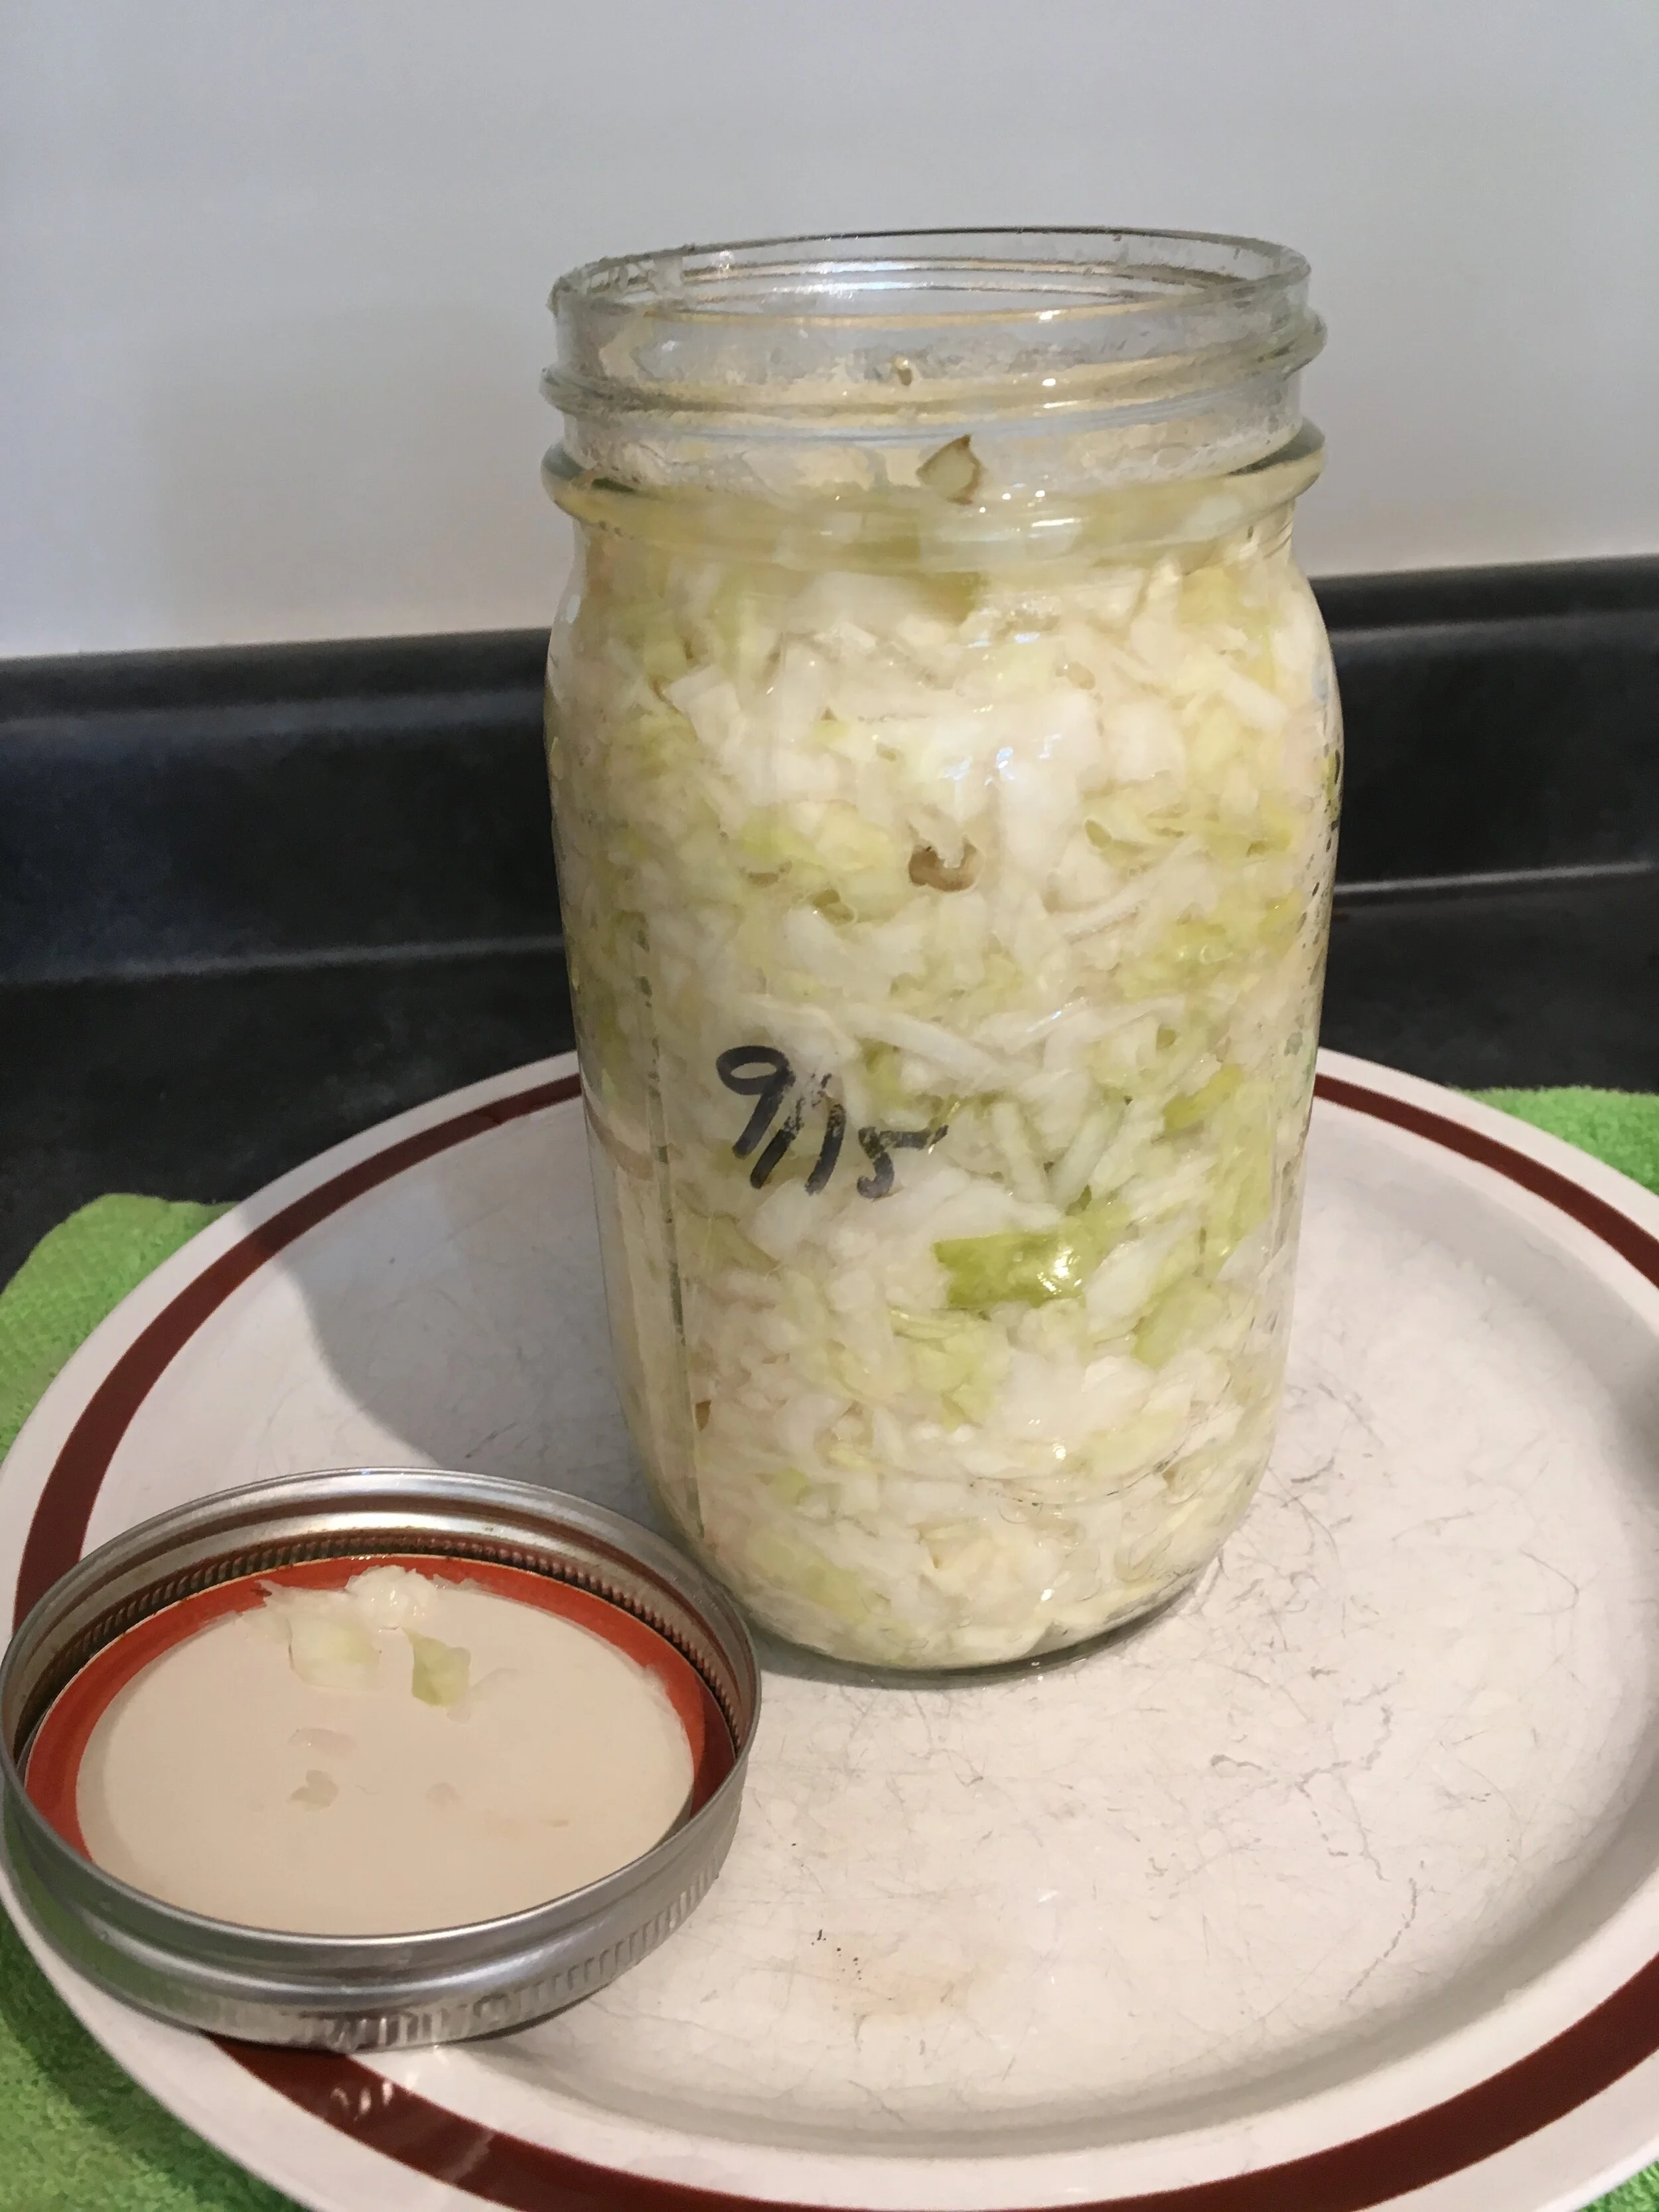
  • 1/4 cup of juice from any previous ferment (vegetables, sauerkraut, fermented pickles) - this is charmingly called “backslop”. This step is optional, but kicks the ferment into gear a little faster by adding a dose of microbes and acid.

Equipment:

glass mason jar and lid

mortar and pestle

cutting board and knife

skillet to toast spices

Technique:

  • pull the cauliflower into small-medium-sized florets

  • toast and grind your spices, or open your favorite jar of curry powder or paste

  • slice ginger and garlic

  • Put everything in the jar. You can be methodical, putting the spices in the bottom, then layering cauliflower followed by ginger and garlic, repeating up the jar, finishing with the cauliflower. Or just tumble everything in together. The ferment doesnt really care about order.

  • Leave about 2 inches of clearance at the top, and then pour in the brine to almost cover the veggies.

  • add your backslop to submerge your veggies. If you are not using a backslop, simply add more brine.

  • put the lid on and turn it upside down a few times to shake it all up and distribute the spices.

  • store the ferment in a safe spot, loosening the lid so it can expel CO2, one of the end-products of fermentation.

  • taste in about 5-7 days, and when it is as tangy as you’d like it, tighten the lid and put it in the fridge.

These tangy morsels are great snacks, or served alongside a dal and rice. It’s a beautifully vibrant addition to a thali or regular dinner platter. Don’t discard the curry liquid! It’s great in soups than need some zing, or added to some olive oil to create a curry vinaigrette pre-loaded with acid, salt and probiotics!

Fermented Crisp and Sour Slaw

This salad is a tangy shredded vegetable ferment, tossed with a delicious vinaigrette - no goopy mayonnaise here. It’s a great side for grilled meats or fish, but can stand alone as a lovely lunch salad with a hunk of sourdough and a slice of crumbly blue cheese. The first part describes how to shred and ferment the vegetables. Part 2 describes how to drain and dress the vegetables for a final delicious Fermented Slaw.

Part 1 - Make the fermented vegetables

Ingredients: (can vary according to what you have in the fridge)

1 pound of green cabbage, sliced thinly (purple? broccoli? cauliflower? turnip?)

1 large onion, red or yellow, sliced thinly (I prefer red for the color, and don’t use a sweet onion - too sugary)

1 large green bell pepper, sliced thinly, (or use a mandolin)

1 large carrot (shredded on a cheese grater, large holes)

1/2 green apple, shredded on the same cheese grater (optional)

1/4 pound celeriac (celery root, shredded on a cheese grater, large holes) or 1 teaspoon celery seed

4 tsp salt (2% by weight, so you could also weigh all your veggies for a result in grams, then divide by 100 to get the grams of salt needed)

Equipment:

Chopping board, knife, (mandolin?), large mixing bowl, 2 quart mason jars with lids

Technique:

Mix the shredded vegetables with the salt in the mixing bowl. Massage well with your hands until the vegetables wilt a little and give off some liquid. Pack into the jars, pressing the vegetables underwater. Don’t add extra brine yet. The veggies will settle down over night and express more liquid, but if some still rise above the surface of the liquid the next morning, add more brine (1 Tbs/cup water) or some extra liquid from a previous ferment. Ferment 4-7 days, until the veggies are tangy. Inspect the veggies every morning, submerging then firmly. Taste them at day 4, and continue fermenting until they taste nicely sour. Then continue with part 2.

Part 2 - Construct the Slaw:

Make about 3/4 - 1 cup of vinaigrette. It can be your favorite recipe, or try the mixture suggested below by my friend Alex Lewin (Author of Real Food Fermentation, the book which has inspired many of my recipes).

Put the fermented vegetables in a colander in a large bowl and press out the juice. Reserve.

In another bowl, mix the pressed fermented veggies with half of the vinaigrette. Add more if needed to nicely moisten the veggies - don’t drown them. Put the mixture back in your jars and refrigerate.

Voilá! Fermented Slaw! Enjoy!

****

Alex’s Carolina-Style vinaigrette: 1/2 cup of juice pressed from the ferment, 1/4 C of honey, 6 Tablespoons of oil (sesame? olive? coconut? Your choice, or mix it up!) 2 teaspoons of dry mustard, 1 tsp grated fresh ginger, freshly ground black pepper.

What to do with leftover fermentation juice? Mix with oil and spices and make salad dressing. Use as a salty-sour liquid condiment or addition to soup. Use it as a marinade. For your next vegetable ferment, use it to cover the vegetables instead of plain brine. It’s a source of probiotics, so you could also drink it as a tonic - watch out, it’s very salty!!

Lacto-fermented Vegetables

This is an easy and basic technique you can apply to almost any vegetable. Lacto-fermenting the vegetables turns them into a live probiotic food, preserves them so they don’t require refrigeration, and boosts their safety and nutritional value. The microbes add vitamin B12 and K, and pre-digests some of the fiber. The ‘lacto-’ part means that a lot of the fermentation is performed by the microbe species Lactobacillus, among many thousands of other species. The microbes in the ferment metabolize the plant sugars to release lactic acid and other delicious byproducts, resulting in a tangy funky umami-rich flavor profile.

Ingredients:

Choose one or some of the following to equal a pound of vegetables (more is fine, you’ll just be chopping for longer).

Radishes (any color - the black ones are very metal), Daikon radishes (the purple ones are are trippy), carrots (any color, so rich!), red peppers, turnips, rutabaga, onions (red, yellow, green), garlic cloves, ginger coins, Brussels sprouts, fennel, Kohlrabi, broccoli, cauliflower, cabbage (red or green), celery root, baby bok choi, green beans, cauliflower chunks, even leaves like kale, collards, spicy mustard can go in. Herbs and spices are delicious and fun to add, so collect any or all of the following: cumin, coriander, black peppercorns, red pepper flakes, fennel, rosemary, lemon or other citrus zest. You’ll make your own signature flavor ferment.

Materials and equipment:

Regular salt*, water, jars with lids (any size - I use mason or ball jars with plastic lids), a measuring cup and measuring spoons, maybe a kitchen scale, chopping board, big and small knife.

Technique:

1) Chop the vegetables. Get creative and make shapes (hearts, flowers, triangles, squares…) and pack the veggies into the jars. Either tumble them in or arrange them artfully. You can layer them with slices of onion, or throw in handfuls of whole spices. Leave at least 2 inches of headroom at the top of the jar.

2) Make 2% brine (1 T salt/cup water = approximately 2%*) and pour it in to cover the vegetables, or you can get fancy and use an online brine calculator. Optional; you can pour in a dollop of liquid from a previous fermentation - sauerkraut, fermented pickles, yogurt whey - if you wish to give your ferment a boost. Not necessary though, You’ll create an environment for the correct microbe populations to thrive, boom and bust setting the stage for the next wave of microbes.

3) Put a lid loosely on the veggies and put them in a cupboard at room temperature. Wait 4-5 days, resubmerging the veggies every morning - keep them underwater, the microbes need an anaerobic environment. Taste them - when they are tangy enough to your palate, tighten the lid and put them in the fridge. They will continue to ferment, but at a much slower rate than at room temperature.

Some of my favorite combinations:

  • white daikon spears with black peppercorns and red pepper flakes - put a spicy fermented spear into a martini (gin, of course) as a savory addition replacing an olive!

  • coins of variously colored winter radishes pack beautifully into a jar

  • purple-topped turnip rounds with red onion slices, black peppercorns, coriander and green onion lengths - amazing on a salad or with a grilled entrée

  • green cabbage sauerkraut with outrageous pink watermelon radish hearts or triangles along the sides make a lovely gift

  • halved dark green Brussels sprouts with whole cumin, coriander and black peppercorn

There are so many possibilities! Let me know what you discover!

_____________________________

* Salt caveat: Salt (NaCl) is part of the environment you create to nurture the desired microbes and discourage the wrong ones (for example Clostridium Botulinum or E. Coli). If you are creating a ferment for a low-salt-person, you can decrease the brine concentration to 1% and add some sour/acidic cloudy liquid from a previous ferment - called “backslopping”. This immediately decreases the PH (increases acidity) and gives the desired microbe populations an advantage to out-compete undesirable competitors. Be assiduous about keeping the vegetables underwater, and monitor the ferment vigilantly. Your nose will tell you if anything is wrong.

In terms of food safety, fermented food is very safe. C. Botulinum and E. coli cannot survive in the low PH (acidic) environment rapidly created during the first phases of fermentation, such that the beneficials rapidly out-compete any competition.

turnips, celeriac and rutabagas from an overexuberant CSA share

Kimchi

I’ve adapted this recipe from my friend Alex Lewin’s book Real Food Fermentation, Preserving Whole Fresh Food with Live Cultures in your Home Kitchen. I love how he writes, There are lots of pictures, and he gives lots of tips and troubleshooting for many ferments.. Here’s a link to check his book out on Amazon. Props also to my friend Hans Breaux, who has also shaped this recipe which is a work in progress.

Ingredients:

  • 2’ish pounds of cleaned vegetables: chopped Napa cabbage, any other cruciferous vegetables in pieces (radish coins, daikon spears, bok choy, kale shreds etc. (I like to chop my radishes into fanciful shapes like hearts and flowers.) carrots, peppers… I make sure the bulk of it is crucifers. They are the best source of microbes.

  • big bowlful, (or very clean 1/4-sinkful) of water, 1/3 C salt dissolved in it to make brine - it needs to taste quite salty!

  • 1/2 head of garlic (3-4 cloves or more!), skinned

  • 1 large or 2 small onions, chopped

  • 1/2inch knob of ginger root, grated

  • up to 1/2 C of Korean red pepper powder, red pepper or pepper flakes (** careful, to your taste) Or none if you are capsicum-averse.

  • 1 tablespoon of sugar, or 1/2 an apple or pear

  • 1 teaspoon of fish sauce (optional - this is why kimchi might need it’s own fridge) and/or fermented shrimp paste. To make it vegetarian, use soy sauce.

  • a few scallions, chives or spring onions

Instructions:

  • Put the chopped veggies into the brine and allow to sit 6 - 8 hours, or overnight. (admittance: I have also done it for 30 minutes and made successful kimchi.) Then drain the veggies. I just pull the plug out of the sink to remove the water, then re-plug to contain the veggies. The sink makes a great mixing bowl.

  • In a food processor, blend garlic, ginger, onion, red pepper, sugar and fish sauce. add minimal water to blend easily in to a paste.

  • Cut scallions attractively into diagonal 1 inch lengths, and add to veggie mixture.

  • Add the paste to the veggies and mix thoroughly. You might want to use gloves depending on how spicy you’ve made your mixture.

  • Pack into jars leaving 2 inches of space at the top, and press down to remove bubbles - liquid will rise to cover the veggies and might spill out as the ferment progesses, so I put my jars on a plate. This is an anaerobic (oxygen-free) ferment, so keeping the veggies submerged is important. You can put in some extra brine if necessary (1T salt to 1 C water) Close the jar lid (not too tightly, so CO2 may escape) and put into a cool dark place. I use a cupboard.

  • Check the jars every day - I suggest doing this in the sink. Keep submerging the vegetables to avoid mold. Taste in a day or two, it will start to taste (and smell) like kimchi very quickly! Put it in the fridge to slow the fermentation to a crawl once it has reached the desired kimchiness (5-7 days for my taste).

Kimchi is yummy on salads, in soups, as an interesting sandwich addition - anywhere you’d use sauerkraut and more!

IMG_3057.jpg

Sauerkraut

I’ve adapted this recipe from my friend Alex Lewin’s book Real Food Fermentation, Preserving Whole Fresh Food with Live Cultures in your Home Kitchen. I love how he writes, There are lots of pictures, and he gives lots of tips and troubleshooting for many ferments. Here’s a link to check his book out on Amazon. If you want a bit of live coaching, you are very welcome to grab a cabbage and join me from your kitchen on 10/7 or 11/4/21 for a zoom workshop. If neither of those dates work, you can also purchase a link to my video stream and make sauerkraut any time it suits you.

Ingredients:

  • A head of cabbage, green or red (red cabbage will give you pink or ruby kraut. You can also mix them up or layer them)

  • sea salt (2 teaspoons per pound of cabbage. The correct amount of salt is important.)

  • that’s it.

Instructions:

Remove the outer leaves and the core of your cabbage. Weigh it now before it gets messy.

Chop your cabbage roughly or finely (finely chopped creates more surface area, so the ferment will move along faster) according to your taste, and put it in a big bowl. You might have to do this in two batches if you have a lot of cabbage.

Add the appropriate amount of salt to the chopped cabbage and massage it firmly with both hands until juice starts to be expressed. You might have to pound it a bit. I use the mortar from my mortar and pestle. (Be careful of your bowl if you decide to pound. I learned the hard way that a metal bowl might be a better choice.) A fresher cabbage will be juicier.

Pack the cabbage into clean glass jars leaving a couple of inches at the top, because the cabbage will expand and liquid will rise. Use something to press it down hard to expel bubbles and have the juice rise above the level of the cabbage. I use wide-mouth mason jars and pack it down with my mortar. Any sealable jar will do. The trick is to get the cabbage underwater to protect it from oxygen.

If you don’t have enough liquid expressed to cover the cabbage, add a bit of brine (1 tbsp salt dissolved in 1 C of water), or a splash of yogurt whey, or previous batch sauerkraut/other veggie ferment juice.

Store in a cool dark place preferably between 50F-75F (10-25C). I put mine in a cupboard. Apparently, the optimum temperature is 70F/21C. And store them on a tray or plate because some liquid might leak out.

Check everyday for the first few days to make sure the cabbage stays underwater. After a week, taste it - use a clean fork so as not to introduce new organisms or salivary enzymes into the ferment. It should be bubbly and start to taste like mild sauerkraut. It’ll get even better from there. Put it in the fridge to slow the ferment to a crawl when it reaches your desired level of krautiness.

IMG_3098.jpg

Shaved Zucchini Salad

There’s only so many things one can do with zucchini, and then you have to start stashing it in people’s cars, or secretly putting it on folk’s porches. This is a good one with zucchini that are not too big and still flavorful and tender. In fact I think that’s how you get ahead of the zucchini game. Pick them while they are still small- medium-sized. Otherwise, they get ridiculous.

1/3 cup extra-virgin olive oil

2 tablespoons fresh lemon juice

1 teaspoon coarse kosher salt

1/2 teaspoon freshly ground black pepper

1/4 teaspoon dried crushed red pepper

2 pounds medium zucchini, trimmed

1/2 cup coarsely chopped fresh basil

1/4 cup pine nuts, toasted (optional)

Small wedge of Parmesan cheese

PREPARATION

Whisk oil, lemon juice, 1 teaspoon coarse salt, 1/2 teaspoon black pepper, and crushed red pepper in small bowl to blend. Set dressing aside.

Using vegetable peeler or V-slicer and working from top to bottom of each zucchini, slice zucchini into ribbons (about 1/16 inch thick). Place ribbons in large bowl. Add basil and nuts, then dressing; toss to coat. Season to taste with salt and pepper. Using vegetable peeler, shave strips from Parmesan wedge over salad.

https://www.epicurious.com/recipes/food/views/shaved-zucchini-salad-with-parmesan-pine-nuts-360251

Screen Shot 2019-08-19 at 2.49.11 PM.png

Summer Lettuce Cups

I made this up for the summer potluck. I wanted easy finger food with protein, not too heavy, and that featured juicy summer garden vegetables. Since the garden is currently spewing cucumbers and tomatoes, they got the job. I used lettuce cups as a wrap for the ingredients for added crunch, moisture-resistance, fiber and finger-food-ability. Bread or crackers would have become soggy and added an unnecessary caloric burden/blood sugar spike.

Best of all worlds - it’s delicious, not messy, tastes great, and feels good in the body later on too. A true Happiness recipe.

Ingredients: package of tempeh (a package of tempeh will give you about 12-13 batons), or 24 smaller half batons, 12 or 24 leaves of butter lettuce, or another firm’ish lettuce that has medium-sized bowl-shaped leaves - endive would work well too. 12 or 24 Cherry tomatoes, cucumber cut into 12 or 24 batons, tzatziki sauce (see next recipe).

  • cut tempeh into 1/4 inch thick batons, marinate in your favorite salad dressing. (I use a home-made balsamic)

  • sauté in olive oil medium heat until golden brown on all sides, set aside to cool

  • make tzatziki sauce while tempeh is marinating (see next recipe, or create your own creamy sauce)

Bring all the ingredients separately to your event along with a nice platter, and find an accomplice to help you. A great way to easily meet new people is to ask them for help with food prep!

To assemble, put a green leaf down on the platter, add a piece of tempeh, a cherry tomato and a cucumber baton. Drizzle lightly with tzatziki sauce. Serve as individual bites, sushi-style for people to nab, wrap and eat in a bite or two.

IMG_2941.jpg

Savory Bok Choi

Christine Sullivan “I made up this recipe a couple of years ago and people seem to like it – enjoy!”

1-2 large heads of Bok Choi or 6 baby Bok Choi

2-4 Tbs olive oil 

1 pkg diced pancetta (4 oz.)

2-3 large cloves garlic, chopped

½ tsp crushed red pepper (optional)

¼ cup water or white wine or stock

Low sodium tamari or soy sauce

  • Wash thoroughly and trim the bok choi. 

  • Keeping separate, chop the stems into ½’ chunks and chop the leaves into 1-2” pieces. 

  • Add olive oil to saute pan on medium heat. 

  • Add pancetta and cook until the fat begins to render, 

  • Add the stems and garlic and saute until tender—do not brown the garlic

  • Raise the heat, add the liquid and several dashes of soy sauce and red pepper if desired and add the leaves

  • Cover, lower heat, and cook for 5-8 minutes until the leaves are tender but not soggy. 

Serve over quinoa or wild rice


Kidney Bean, Avocado and Mango Salad

 By Carie Bernard, L.Ac.

1 can cooked organic red kidney beans, rinsed and strained

1 ripe avocado, diced

1 ripe mango, diced

Extra Virgin Olive Oil

Vinegar (I prefer Umeboshi but choose to taste)

Fresh basil cut in small ribbons to taste.

- Toss all ingredients together. Garnish with 2 basil leaves. Eat at room temperature

Edamame Salad

from Judy Rosen

1 lb. Frozen shelled edamame

3 cups frozen corn or canned corn

1 chopped red bell pepper

3/4 cup sliced green onion

1/2 cup finely chopped red onion

1/4 cup chopped fresh Italian parsley

2 tablespoons chopped fresh oregano or 2 tablespoons marjoram or 2 tablespoons basil

DRESSING:

1/3 cup fresh lemon juice

2 tablespoons Dijon mustard

2 tablespoons olive oil

3/4 teaspoon salt

3/4 teaspoon fresh ground black pepper

Prepare edamame according to package directions. Drain and rinse with cold water. Set aside to drain thoroughly Combine edamame, corn, red bell pepper green onion, red onion parsley and oregano In a large bowl, whisk lemon juice, mustard, olive oil salt and pepper. Add veggies to bowl and toss to coat. Refrigerate until ready to serve.


Not Exactly Raw Kale Salad

Elizabeth O’Neil with changes by Carie Bernard, L.Ac.

1 bunch organic kale

1 tsp. sea salt (I use pink Himalayan salt and it’s divine!)

1/4 cup olive oil, or a little less

1/4 cup currants, or a little more (I use ½ cup of golden raisins)

1/2 cup organic sunflower seeds, toasted pumpkin seeds or cashew pieces, pine nuts or any crunchy nut or seed you like)

2 organic ripe avocados

1 red or yellow pepper

splash of lemon (I love lemon so I use a whole lemon)

Umeboshi Plum Vinegar to taste (or your favorite vinegar)

De-stem kale by pulling leaves away from the stems. Wash leaves. Spin or pat dry very well. Stack leaves, roll up and cut into thin ribbons. Put kale into a large Ziploc bag. Add salt, zip bag and massage it into the kale with your hands for 2 minutes. Make sure that you rub the salt to help break down the kale, but not that it becomes liquid-y.
Add rest of ingredients. Zip bag, allowing air in it. Shake the bag to toss. Serve and enjoy! Stays good in fridge for about 1 day.

Grilled baby peppers in oregano vinaigrette

From Ellen Profenno

Ingredients:

1 lb baby peppers (sweet mini)

mix together in a small bowl for vinaigrette:

1 Tsp fresh oregano (*? dried?)

1 tsp olive oil, evoo

1/2 tsp white vinegar

1/2 tsp garlic salt (*fresh garlic and salt?)

1/2 tsp ground cumin

toss peppers with vinaigrette, thread onto pre-soaked wooden skewers. 2 skewers makes sure the peppers won’t spin. Using outdoor grill, or greased indoor grill pan, grill the peppers until evenly charred, flipping once or twice. It will take about 4-5 minutes per side, but stay vigilant.  once off the grill, serve warm or at room temperature. Sprinkle with more oregano or vinaigrette. (*feta cheese and tomatoes as garnish? – E)

Spiced Sweet Potato Salad

From Robin Silva

2 peeled, cubed sweet potatoes

½ lb trimmed halved brussels sprouts

2 Tlbs olive oil,  1 tsp chili powder , ½ tsp salt

Toss together, bake at 400 degrees on rimmed baking sheet for ~30 minutes, until browned

Whisk together: 2 Tlbs olive oil, 2 Tlbs lime juice, 2 tsp honey ½ tsp salt, 1/4tsp pepper

6 cups mixed greens in large bowl, top with roasted vegetables, 2 Tlbs toasted pumpkin seeds, crumbled feta cheese, toss with dressing.

Judy’s Quinoa Greek Salad

4 C cooked quinoa

1 C chopped Green pepper

1/2 C chopped green onion

1/2 C olives (kalamata olives from Micuccis are the best – but be aware! they have pits!)

1/4 C red onion

1 C cherry tomatoes

1 C chopped canned artichokes

4 oz crumbled feta cheese

1/3 C fresh parsley minced

1/4 C fresh lemon juice (1-2 lemons)

1/4 C red wine vinegar

3 tsp minced garlic

2 T olive oil

salt/pepper to taste

Combine everything in a large bowl. Allow to rest for a few hours.

Holiday Kale Salad!

Full of beautiful greens and reds!

Serves 4 as a side, or 1-2 as a larger salad

  • 1 head kale, rinsed and de-stemmed (I like curly kale for this recipe)

  • ½ tsp sea salt, plus more to taste

  • 1 small green apple, diced

  • ½ red onion, finely sliced (or 2 radishes, finely sliced or diced)

  • ½ avocado, diced

  • ½ cup roasted pumpkin seeds/pepitas (on any kind of seeds or nuts)

  • 4 tbsp raw honey

  • 1 lemon, juiced

Chop kale into bite-sized pieces and put in a large bowl. Sprinkle salt on the kale and with clean hands, begin massaging and squeezing it so it softens. Massage for a couple minutes, until it has reduced in size and is tender. Add apples, red onion, avocado and pumpkin seeds to the bowl (I might add pomegranate seeds as well! – Emma). In a separate bowl, whisk together the lemon juice and honey. Pour over the salad and mix gently. Season to taste.   Note: make plenty for leftovers, as this salad will keep for a couple of days in the fridge!

Cold Pasta/Potato/Rice/Bean Salad

(great ‘Resistant Starch’ recipe)

Make a vinaigrette of the following, modify with what you have on hand,  or simply use 1/2 C of  your fave oil/vinegar salad dressing

1 garlic clove (pressed/crushed)

1/4 t black peppercorns

1/2 t dried tarragon (or thyme or oregano)

grated zest of 1 lemon

1 large finely diced shallot or 1/4 C thinly sliced green onion

1/3 C olive oil

2 T+  vinegar (taste the dressing once mixed – you may want more acid)

salt to taste

Put it all in a lidded jar and shake it up baby!

3-4 cups of cooked and cooled pasta, potatoes, rice, lentils, or canned white cannellini beans.

1 C chopped fresh veggies such as carrots, bell pepper, tomatoes, celery for some crunch and color. – Your choice.

Then pour some of it over the veggies and starch and toss it up until everything is well dressed. You’ll probably have extra dressing – keep it in the fridge.